4. Leave Module
Leave module is the latest updated feature of the Human Resource Management System (HRMS). This module comprises on the following:
1. Leave management
2. Leave application
3. Leave approval
4.1. User Process Flow (Employee)
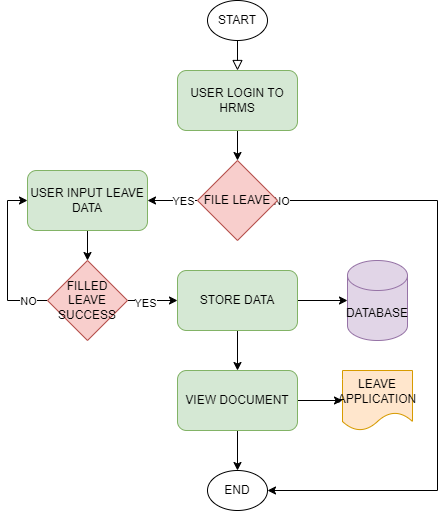
4.1.1. Navigating to Leave Module (Employee Account)

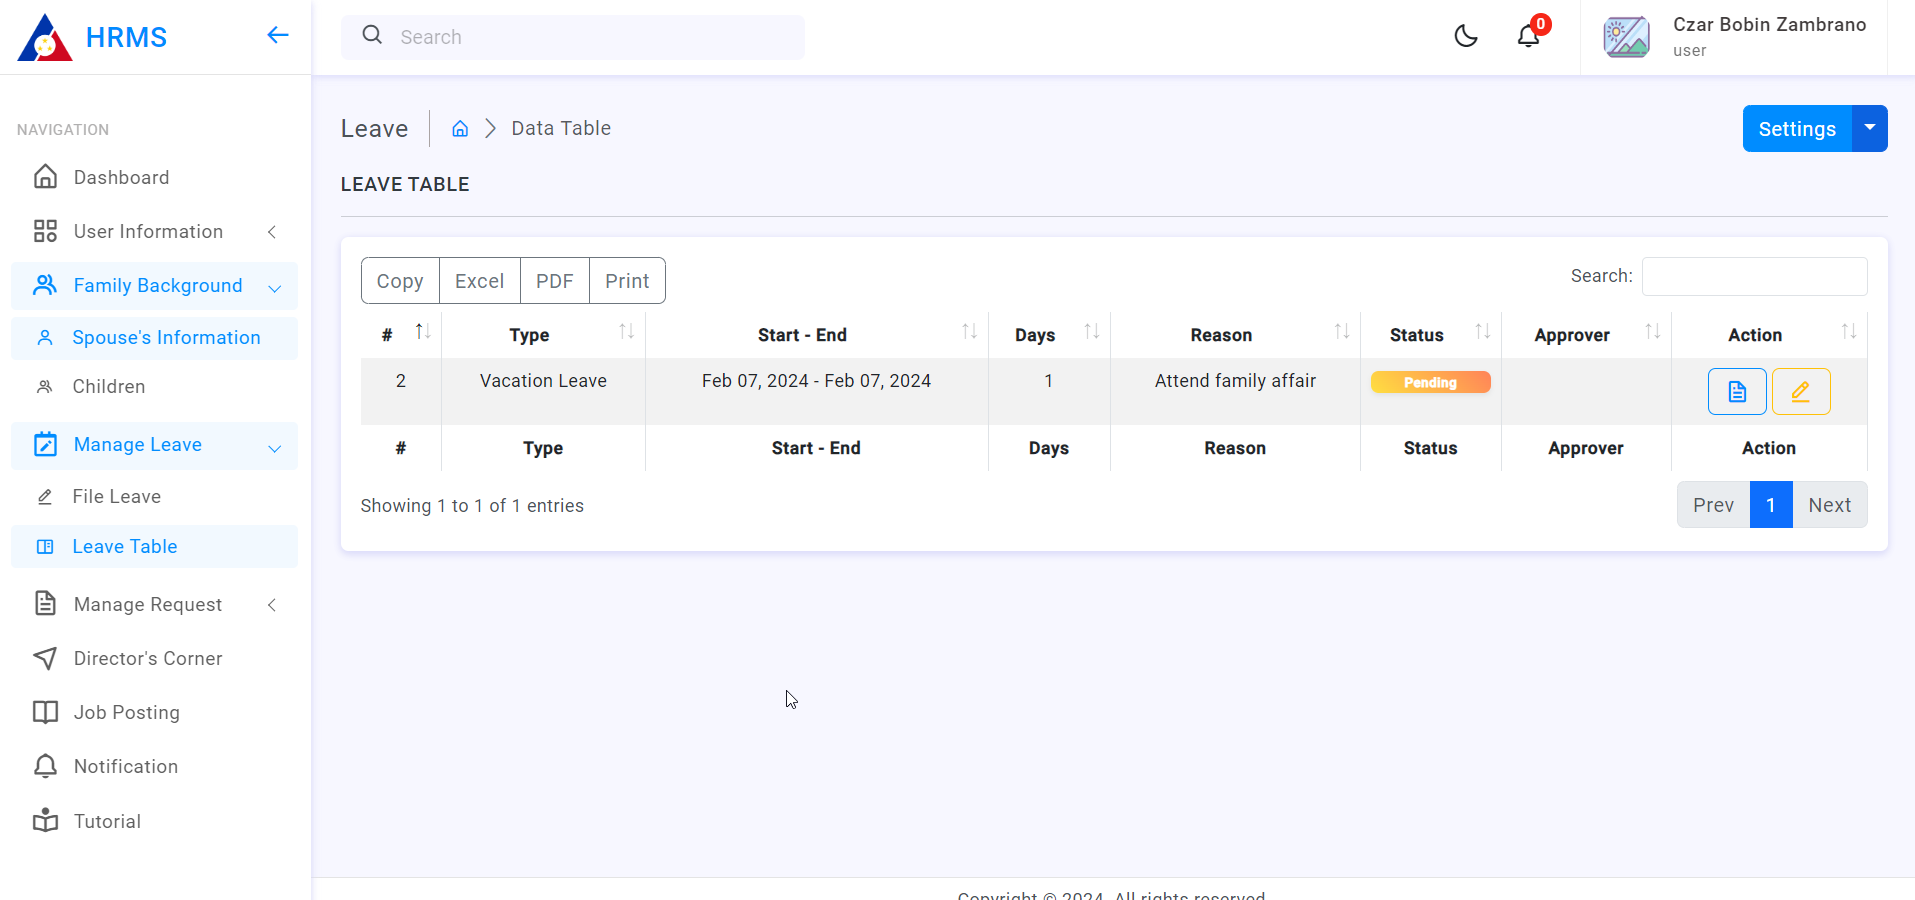
Leave table shows all the filed leave by the employee. Status of application is also indicated on the table. To view the details of the application, you can view the application by clicking on the blue button on the action column of the LEAVE TABLE.
4.1.2. Filing for Leave
To file for leave, employee must login to the system and navigate to the Manage Leave navigation.
1. Login to your HRMS User Account
2. On the navigation dock, located at the left section of the site, click Manage Leave, dropdown will expand
3. Click on the File Leave, you will be navigated to a new page
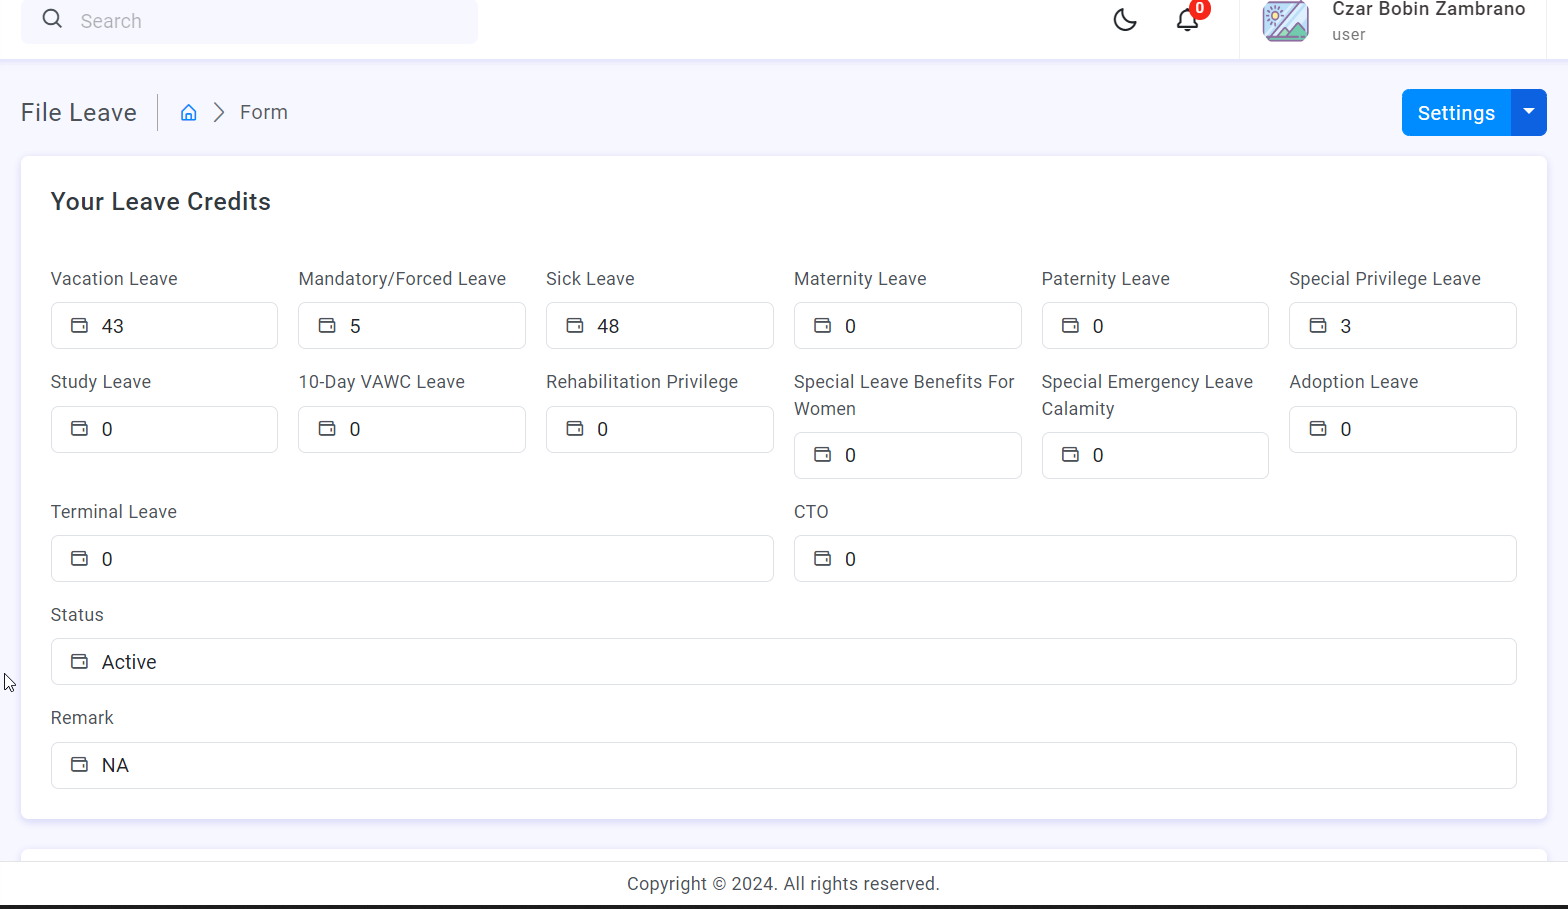
4. On the File Request page, you will see your current leave credit balance
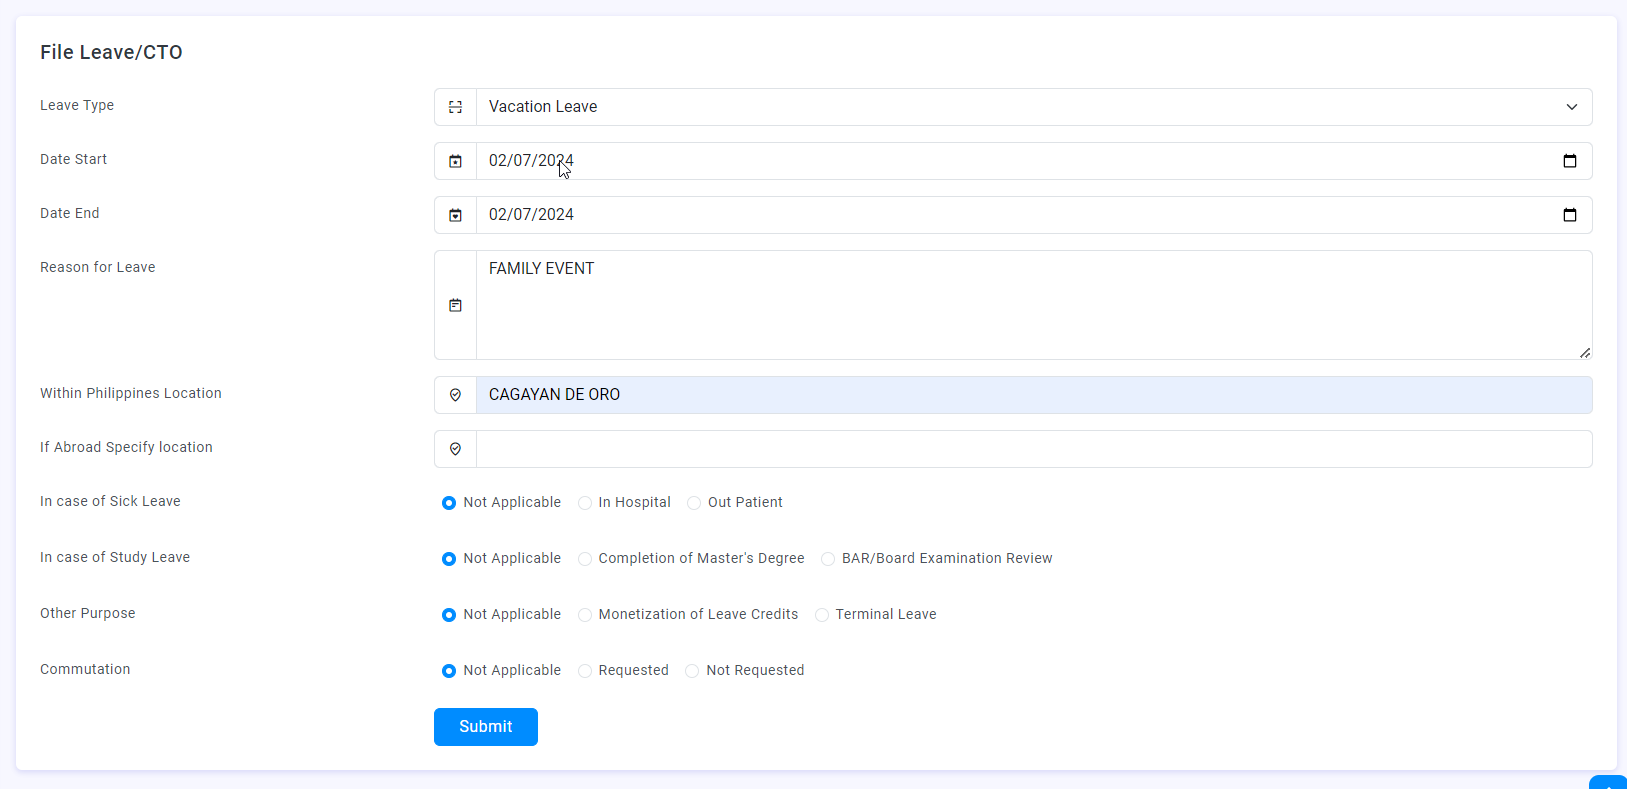
5. Scroll down and fill up necessary details and then click Submit
6. After filing, application will reflect on the Manage Leave -> Leave Table
4.2. User Process Flow (Approver)
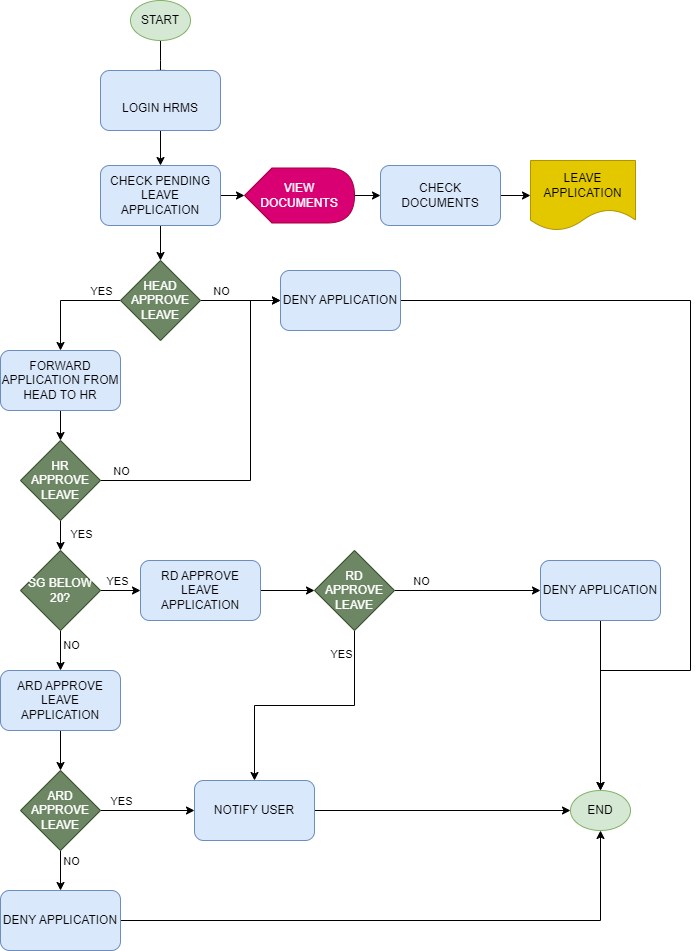
4.2.1. Managing Leave Applications (Approver)
In managing leave applications, approvers are notified thru email and notification bubble (located at the top right section of the page) for any pending application for their processing and approval.
1. Login to your HRMS User Account
2. On the navigation dock, located at the left section of the site, click Manage Leave -> Employee Pending Leave
3. Under the EMPLOYEE FILED PENDING LEAVE TABLE, all pending applications for leave will be displayed here
4.2.1.1. Approving Leave Application
1. Login to your HRMS User Account
2. On the navigation dock, located at the left section of the site, click Manage Leave -> Employee Pending Leave
3. Select an application to approve by clicking on the blue button on the action column
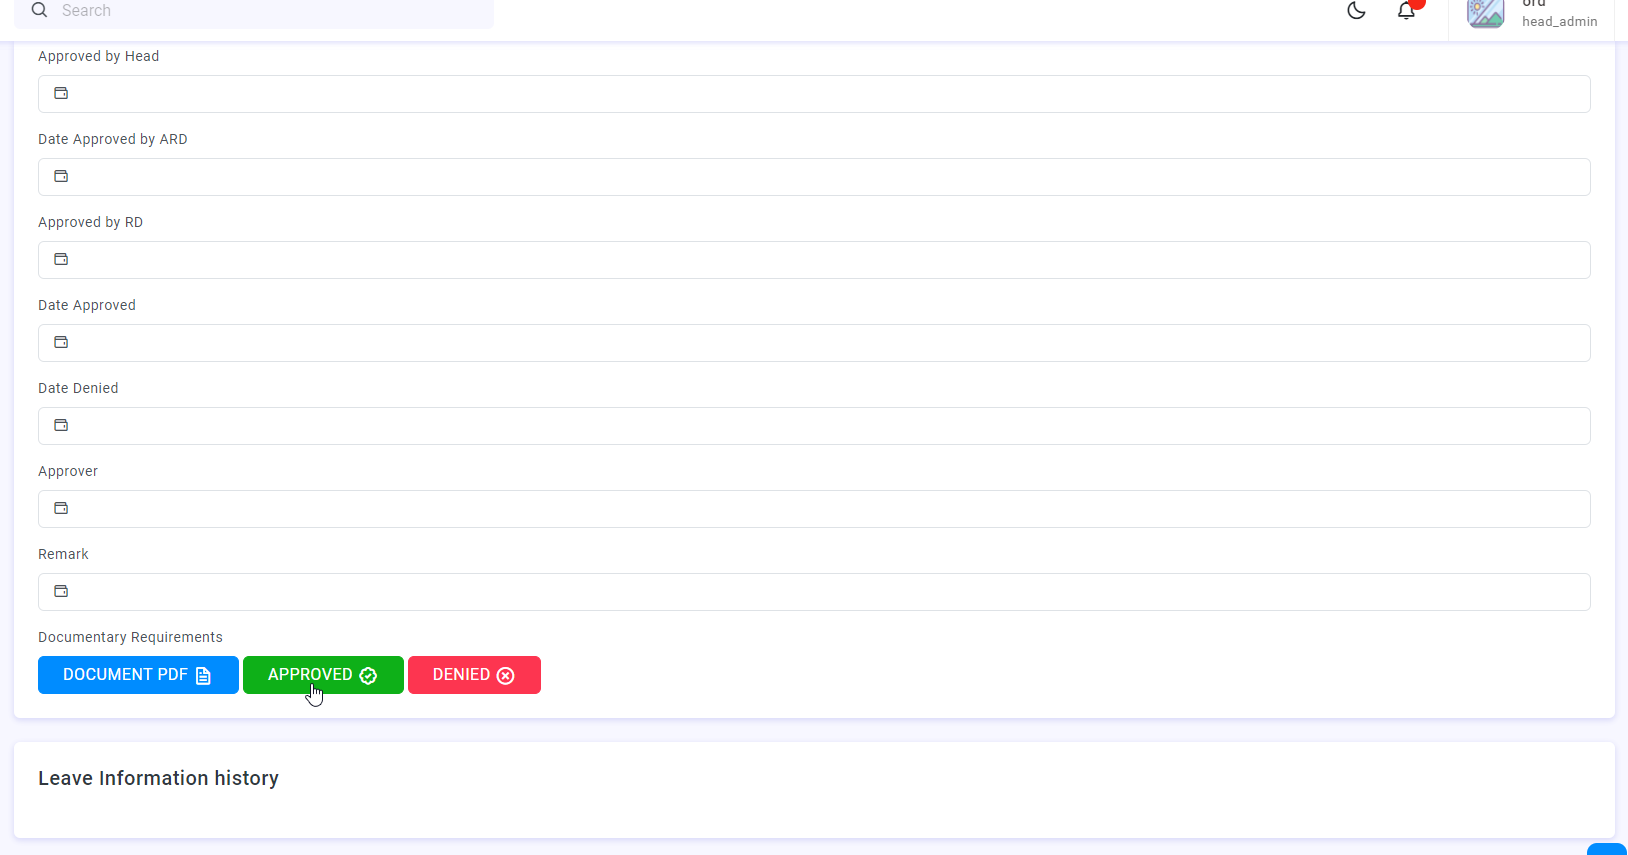
4. Provide feedback on the application
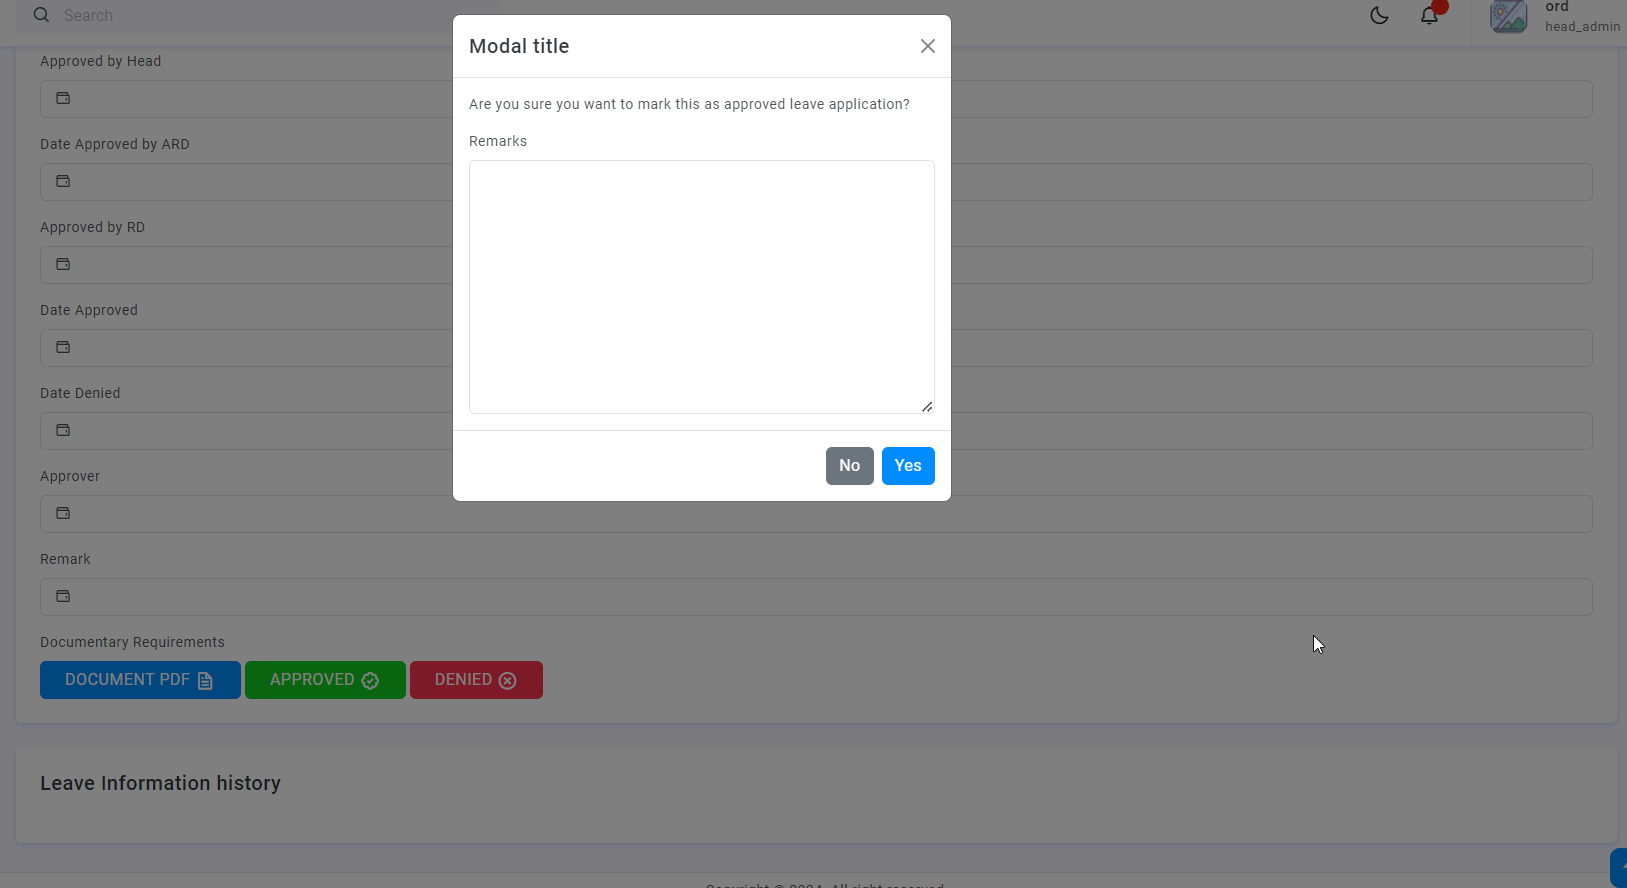
5. After confirming approval of application, employee shall be notified of the status of the application. Leave application remarks will also be posted on the Leave Information History
4.2.1.2. Denying Leave Application
1. Login to your HRMS User Account
2. On the navigation dock, located at the left section of the site, click Manage Leave -> Employee Pending Leave
3. Select an application to approve by clicking on the blue button on the action column
4. Under the application details click on the DENIED button
5. Provide feedback on the denial of leave application